Introduction
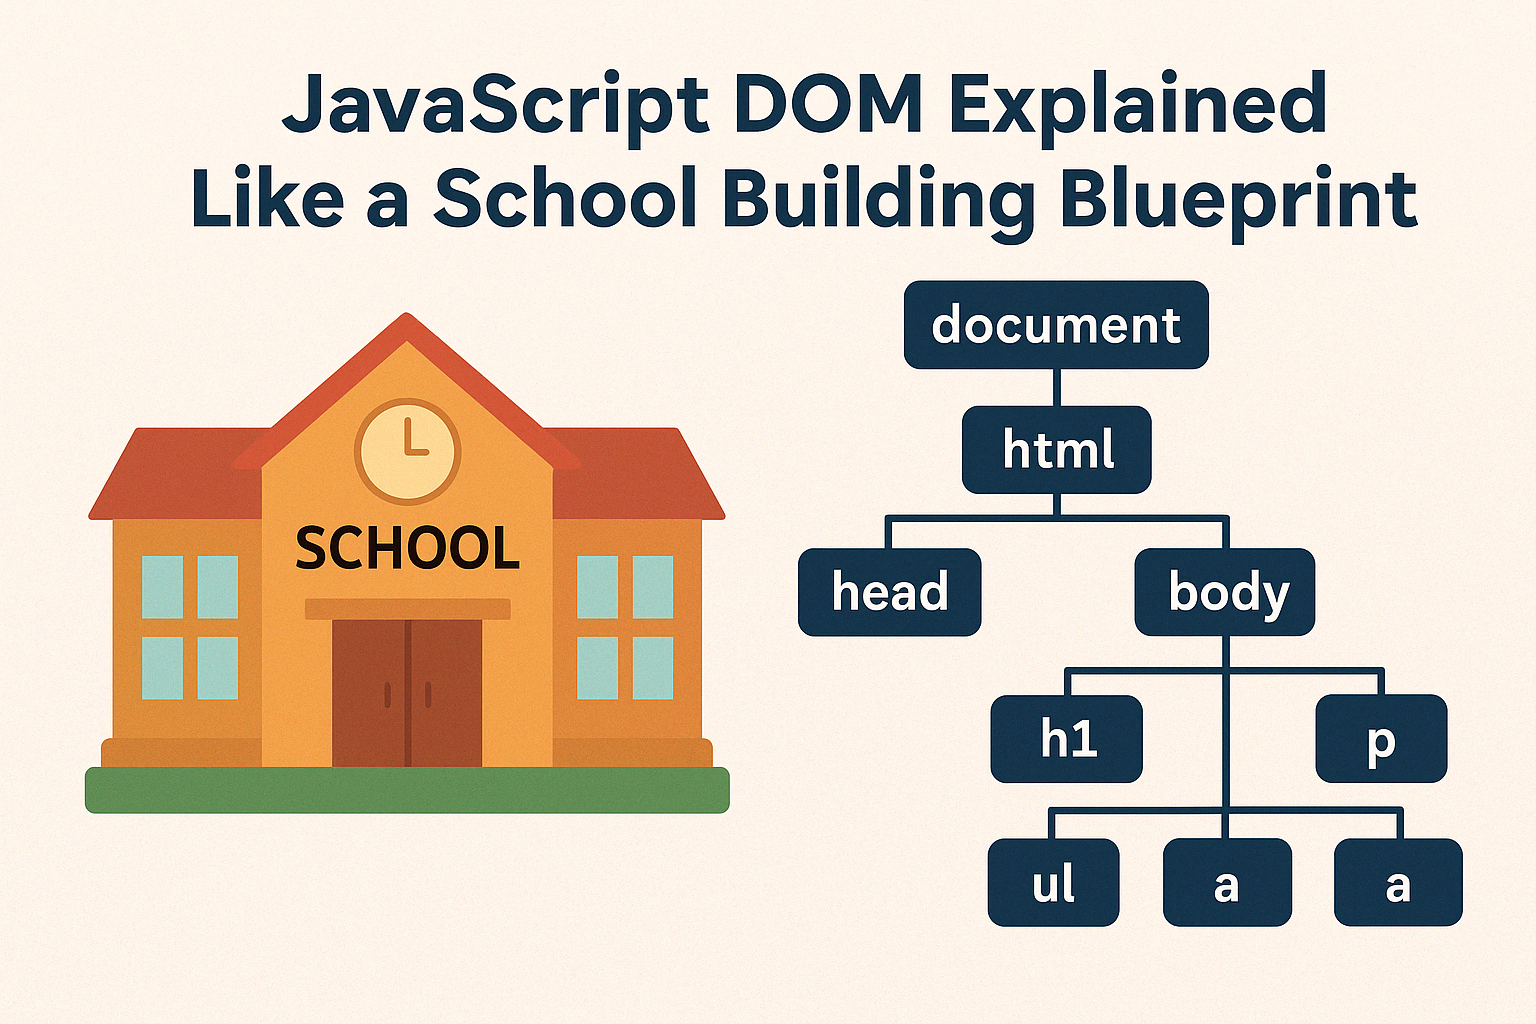
Imagine you’re looking at a school building blueprint. Every classroom, hallway, and cafeteria is clearly marked and organized. Now imagine you have the ability to interact with each room—open the doors, change the posters, move desks around. That’s exactly how the JavaScript DOM (Document Object Model) works!
In this post, we’ll explore the DOM using a school blueprint analogy. Whether you’re just getting started or brushing up on web development basics, this guide will help you understand how JavaScript connects with HTML to interact with the webpage structure.
What is the DOM? = The School Blueprint
The DOM is a tree-like structure that represents all elements of an HTML document. Just like a school blueprint maps out every room, the DOM maps out every element on a webpage—from the <html> tag down to every <p> or <button>.
<html>
  <body>
    <h1>Welcome</h1>
    <p>This is a page.</p>
  </body>
</html>
📌 Key Takeaway: The DOM is your digital school map. Every element (room) has a position, parent, and purpose.
Accessing Rooms = Selecting Elements
To interact with a room on the blueprint, you need to find it. In JavaScript, you can access HTML elements using methods like:
document.getElementById("welcomeBanner");
document.querySelector(".announcement");
document.querySelectorAll("p");
These are like using coordinates on a blueprint to locate specific rooms or items.
📌 Tip: Use querySelector() for flexibility, getElementById() for direct access.
Changing What’s Inside = Updating Content
Want to change the poster on a classroom door? You can update content in the DOM:
document.getElementById("welcomeBanner").textContent = "Welcome, Students!";
📌 Key Takeaway: textContent and innerHTML let you change what’s written or displayed in the room.
Changing the Decor = Modifying Styles
Just like you can repaint a classroom or add decorations, you can update styles:
document.querySelector(".notice").style.color = "blue";
document.querySelector(".notice").style.fontWeight = "bold";
📌 Key Tip: Use .style to directly change how an element looks.
Adding and Removing Rooms = DOM Manipulation
Want to add a new lab room or remove an outdated classroom? You can add or delete elements from the DOM:
let newPara = document.createElement("p");
newPara.textContent = "New announcement posted!";
document.body.appendChild(newPara);

let oldPara = document.querySelector(".old-notice");
oldPara.remove();
📌 Key Tip: Use createElement() and appendChild() to build new rooms. Use remove() to clean up.
Event Listeners = Room Reactions
What if a room could react when someone walks in? Event listeners let rooms (elements) respond to actions:
let door = document.getElementById("classroomDoor");
door.addEventListener("click", function() {
  alert("The classroom door was opened!");
});
📌 Key Takeaway: The DOM isn’t static. You can make rooms interactive with event listeners.
Real-Life Projects Using the DOM
✅ Create a school-themed interactive webpage
✅ Build a dynamic class schedule viewer
✅ Make a quiz interface that responds to answers
✅ Design a noticeboard that updates in real time
Conclusion: Your Code = The Architect
The DOM is like a school blueprint that JavaScript can read, modify, and enhance. From accessing rooms (elements) to changing posters (content) or repainting walls (styles), your code has full control over the school.
✅ Learn to select and modify elements
✅ Add interactivity with event listeners
✅ Build, remove, and rearrange the layout on the fly
📌 With the blueprint analogy, DOM manipulation becomes easier to grasp and much more fun to build.
🎓 Up Next: JavaScript Scope Explained Like Classroom Access Cards!